
Master your understanding of compression settings:
Quick guides to compression settings for instruments:
If you’re reading this article it’s because you’re about to embark on mixing your own vocals. It can be a daunting task, but I have been recording and mixing vocals for ten years and have learned just about everything you should, and shouldn’t do when mixing your vocals. In this article, I’m going to share exactly what it is I’ve learned from 10 years of industry work, so you can get better mixes for your vocals.
Contents
Do You Need Compression on vocals? Things To Check Before Compression
Like everything in music production, it depends on what the song and project need. If for instance, you’re recording a sparse production with just vocals and an accompanying instrument such as a guitar or piano, you’re going to need little to no compression.
If on the other hand, you are inserting vocals into a jam-packed rock production, or over a lively hip-hop beat, you’re going to have to be a bit smarter about things. In these cases, you’ll need to apply certain techniques that will allow your vocals to sit front and centre.
Vocal Clip That Doesn’t Need Compression (Sound Example)
In the above clip, there are only two tracks, the vocals, and the guitar. As there is plenty of space for both elements there is no immediate need for compression.
I have added some reverb to taste and voila, that’s all.
You might apply some glue compression on the mix bus in order to tame some of the transients, but by and large, this can remain uncompressed.
Vocal Clip That Needs Compression (Sound Example)
In the next clip, you’ll notice that there are quite a few more elements to consider. There is a full drum kit, as well as a bass and guitar.
In order for the vocals to sit nicely in the mix I’ve applied some compression to bring up the quieter parts and tame the louder transients.
Finally, I’ve added a little bit of room reverb for a natural sound and to give the aural impression of a full band playing on stage.
If your vocals are sounding weak make sure that there aren’t any phase issues. This will generally only occur if you have recorded your vocals using two different microphones.
Automation
While it is perfectly fine to simply compress the vocals, if you are aiming for a truly world-class, radio-ready mix it’s recommended to apply front-end automation. By front-end, we mean manually automating the vocal signal before it reaches the compressor.

By doing this you even out many of the transients and rein in the dynamics so that the compressor doesn’t have to work so hard. This will give a much more natural sound and let the musicality of your compressor shine through.
A great tip is to boost the tail end of a word in order to bring out the emotion in it. It has a subtle but pleasing effect on the ear.
You can choose to go the whole hog and automate every syllable, or just individual phrases or vocal lines. It’s up to you how much granularity you wish to contribute to the process. Think of it like this though – every little detail and change you make does add up.
You may not notice the efficacy of manual automation immediately, but compare the non-automated version to the automated version and you’ll see a lot of extra clarity.
A popular tool is the Waves Vocal Rider, which is a plugin that automatically handles this task. Of course, a plugin doesn’t know what your desired sound is, it can only approximate it based on its programming.
Therefore, the best approach is to use the Waves Vocal Rider to do the bulk of the automation, and then go in and manually boost the ends of phrases or change any other dynamics to taste.
How To Set Up Your Compressor For Best Results
1. Proper Gain Structure
Gain structure, or gain staging, is acknowledging each stage in the signal path and ensures a good signal-to-noise ratio. Noise in this instance is the background hum of circuitry or bleeding from other instruments.

The aim is to have a strong enough signal without clipping, which in turn decreases the likelihood of audible background noise.
Consider the stages of signal from your microphone through to your DAW. How close are you standing to the microphone, what volume is your preamp or sound card input gain, and are you using any outboard gear or software? You should aim to have a strong signal with no clipping feeding into the next stage at every level.
The noise floor is the ambient noise of a particular stage in your signal chain, for instance, the inherent hum of a preamp relative to your signal.
Each stage has the likelihood of introducing noise, and also of amplifying any noise from all previous stages in the chain. Therefore the aim is to boost your signal to a place there is no clipping and also comfortable headroom. Anything from -8 to -15dB is what you should be gunning for.
2. Choosing The Right Compressor Style
Types Of Compressors
Here are the 4 main types of compression:
- VCA
- VCA compressors use a voltage-controlled amplifier (VCA) to attenuate the signal, hence the name.
- Tube (vari-mu)
- This compressor type uses a vacuum tube to attenuate the signal. Mu is the technical term for gain, so vari-mu means variable gain compression.
- FET
- FET gets its name due to the Field Effect Transistors it employs to recreate the tube sound of a variable-mu compressor.
- Opto Compressors
- Opto compressors use a light source and a photocell to modulate the compression. Essentially the brighter the light the harder the compression. They are popular with vocals due to their slow attack time, which offers very smooth compression. As mentioned previously, fast attack times can choke a vocal take.
How To Choose The Right Compressor For Vocals
In order to choose the best compressor you need to consider what kind of compression settings you require.
Do your vocals have a lot of dynamic range which you need to rein in? Are they rock vocals that you want to squash and inject with lots of character? Do you want transparency or colouration? Let’s go through a few styles:
Transparency
If you don’t want any colouration or harmonic distortion applied to the compressed signal then a VCA compressor or an Opto compressor is your best bet.
There are times when transparency is needed, such as in mixing or mastering, where you just want to tame transients without adding any additional colour or warmth.
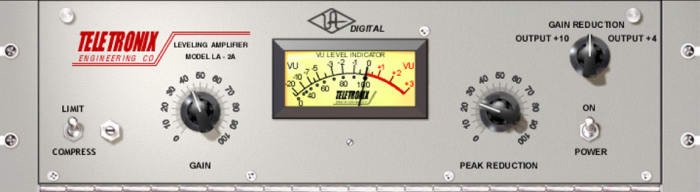
The Universal Audio Teletronix LA-2A is a great opto compressor known for being punchy and transparent.
Natural Sounding
If you want something with a slow attack and release time that will compress your signal without being overly noticeable then Opto and vari-mu compressors are best for this job.
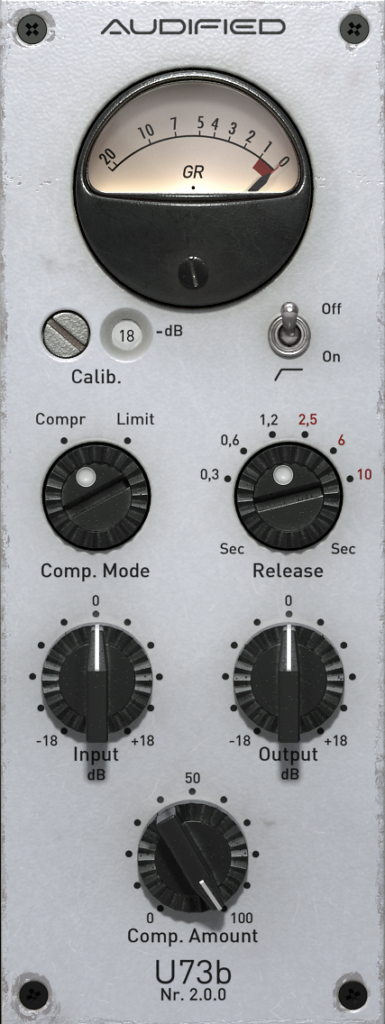
An example of a popular variable-mu compressor is the Audified U73b, an old German broadcast compressor, used initially to even out peaks and transients on radio transmissions.
Colouration
If you wish to inject some life into an underwhelming performance or add harmonic distortion and flavour to a mix bus then the transformers in an FET compressor or a vari-mu compressor will aid you.
Note: transparency is a personal choice. Therefore when mastering a track you must decide whether to use a transparent or colourful compressor
Fast attack/release time
If you have many fast transients, for instance, a hip-hop vocal,l then you’ll require something with the power to act quickly and decisively.
For this, you’ll require an FET or VCA compressor.
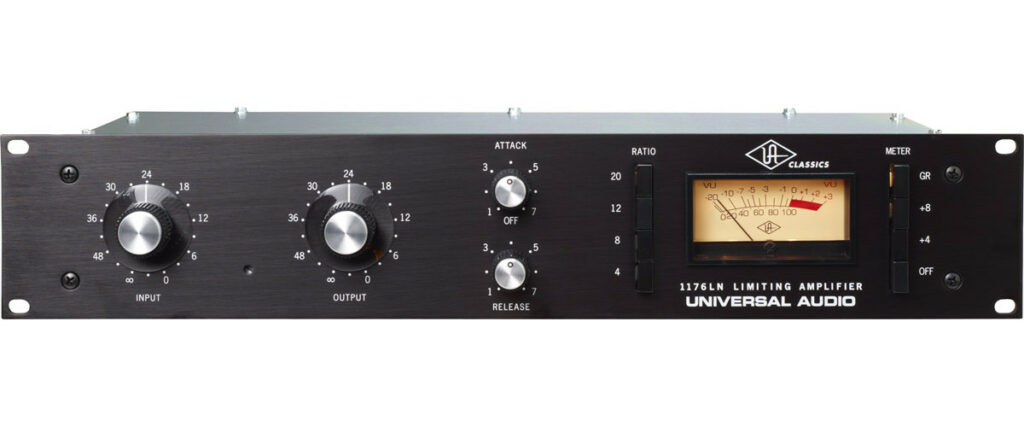
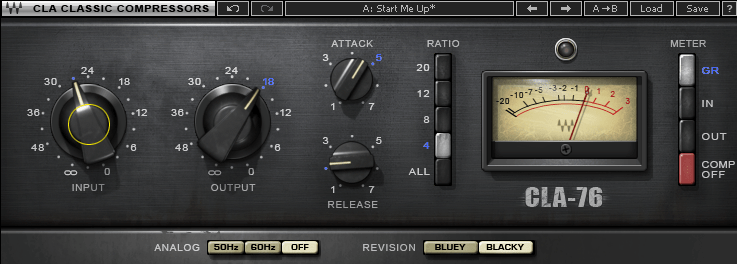
Generally regarded as the preeminent compressor for vocals, the UA 1176 is an FET compressor. It works particularly well with the attack set at its slowest and the release at its fastest. Note that the attack and release dials are inverted on this piece of hardware, so dialling from left to right will have the opposite effect.
3. Threshold Settings
The threshold controls at which point your compression kicks in. It is measured in dB and anything above that level will be attenuated.

For jazz, pop and anything quite polished you only want to be attenuating by around -2-4dB but for rock or metal where you want things more punchy then attenuating by around -5-10dB is preferable.
Dial in the threshold until it’s audible and quite aggressive sounding. Once you’ve reached this point then dial it back until it’s barely noticeable.
4. Setting Your Ratio Controls
The ratio is intrinsically tied to the threshold. If the rate at which the signal passes the threshold gets compressed. A ratio of 1:1 for instance won’t compress anything passing the threshold. A ratio of 2:1 means that 4dB passing the threshold will be attenuated to 2dB. 8dB passing the threshold will be reduced by 4dB, and so on.

5. Setting your Attack & Release Times
Attack
The attack dictates how fast the compression kicks in. Picture a tiny hand reaching for the volume dial any time something passes the threshold.

Try not to use fast attack times on your vocals as it’s going to dull the transients. Fast attack times will push the audio signal away, so if you are aiming for a certain amount of depth then by all means use a faster attack time, but generally for vocals, it’s best to stick to around 10-20ms.
If you ever want to hear what the attack time is doing, simply drop the threshold really low to get a clearer picture. A slow attack will sound very aggressive, whereas a slower attack time will be quite dull.
Release
The release is how long it takes for that tiny hand to remove its grip on the dial.
If your compressor has an ‘auto’ function then it’s recommended you use that. Otherwise, simply start with a medium release time of around 40ms and adjust it until the compression is breathing with the music.

Alternatively, try out a fast release time for a powerful effect. Be careful as it might not suit your vocal take, so it’s best to play around until you are happy.
Knee
Not all compressors have a knee parameter, so don’t worry if you can’t see one on your plugin or hardware.
The knee dictates the pace at which the compression kicks in. If you want compression to come in quite aggressively then use a hard knee, or if you want it to be a bit more subtle and musical then a soft knee is preferable.

6. Managing Gain Reduction With Makeup Gain
Once you’ve tamed all transients, and attenuated anything past the threshold, you may find that the overall volume of your vocals is now reduced. They lack presence and are sitting further back in the mix. That’s where the makeup gain comes in.
This feature boosts the attenuated signal so that your vocals are pushed back to the front of the mix.
Using Advanced vocal Compression Techniques
Now that we’ve gone through the basics of compression, let’s take a look at some advanced techniques. You’ll be pleasantly surprised to find that they are actually quite straightforward!
1. Parallel Compression

Parallel compression is a technique that quite simply blends a mix of the dry uncompressed signal with the compressed signal. Also known as ‘New York compression’, this process lets you retain the dynamics of the uncompressed signal, while also benefiting from the glue and energy of a compressor, giving you a pleasing, natural sound.
2. Serial Compression

This type of compression involves combining two or more compressors to perform different compression tasks that one alone could not do.
For instance, you may want one compressor for its gluey ability to tame transients, while the second adds colour and excitement.
Additionally, instead of having one compressor attenuating by 3-4dB, having two compressors reducing the signal by 1-2dB each will have the same effect but sound more natural and unprocessed. Sharing the load!
3. Sidechain compression

Sidechain compression is when the signal from one channel triggers compression on another.
For instance, you can sidechain your bass guitar to the kick drum so that it becomes attenuated each time the kick plays. If you set a fast attack and release time it will duck the initial hit of the bass and let the kick shine through, before returning the bass to full volume.
This is often utilised in order to get the punch of the quick, while still retaining the full body of the bass.
You can play around with the sidechain effect in plugins, in order to get a pumping EDM-style sound for instance by setting a slower release time. Obviously, this may not work on all genres and oftentimes is only used sparingly in order to keep certain instruments up front in a busy mix where many elements may be jostling for space.
4. Multi-band Compression
Multi-band compression is the process of applying compression only to certain frequencies. An example would be compressing the low end in order to boost the kick. As the compression is only being applied between 50-200hZ you don’t need to worry about the higher end being affected.
This allows you to compress the mid-range using different settings that are more suited to those frequencies. This is very useful for master bus compression, where you can apply a slow attack and fast release to the mid-range in order to only target the vocals.
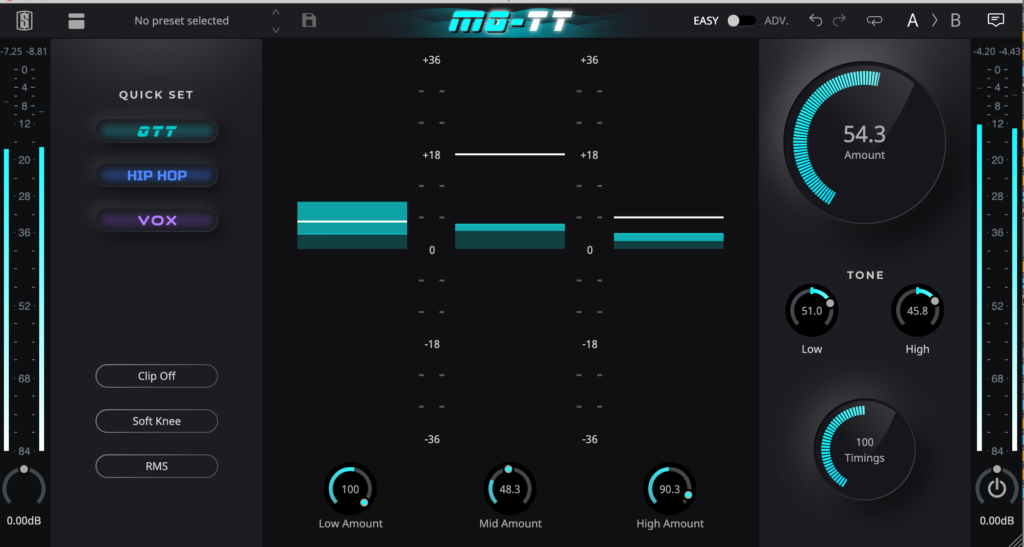
This can be achieved by using multiple compressors on individual instrument busses, or by using a dedicated multi-band compressor such as Slate Digital’s MO-TT which divides compression across three frequency bands.
5. Limiting
A limiter is similar to a compressor. The ratio is really high (above 10:1), so if 10dB passes through the threshold it will be reduced to 1dB. When the ratio is set to ‘infinite’ it will remove anything that passes the threshold, and this is often referred to as ‘brick wall’ limiting.
Since anything that passes the threshold is instantly reduced in volume they should not be relied on for adding harmonics or musicality. Their best asset is their transparency which can be counted on for eliminating inconsistent peaks.
If your vocals are sitting too far back in the mix a limiter can be used as a transparent makeup gain. Start with a high threshold and dial back the output ceiling until you’re happy with the results. Boost your input gain and observe the gain reduction meter to see how much you’re clamping down on volume.
FAQ
How Should A Vocal Processing Chain Look?
Most vocal processing chains have three things:
- EQ
- Compression
- Reverb
And generally in that order, although not always.
The EQ will help the vocals sit in the mix by removing any unnecessary frequencies, and boosting those you want to shine through.
Compression is next, in order to trim any transients and perhaps boost the overall sound with some makeup gain.
After that, you can apply some reverb, but as a rule of thumb always use way less than you think. Reverb gives the illusion of space and distance, and too much will push your vocals back in the mix. Same as your compression, dial in your reverb until it’s audible, and then dial it back. This way you can ensure a more natural-sounding result.
If your vocals are double-tracked and also have additional backing vocals it might be best to group all your vocals on a bus channel so that your vocal processing chain is applied evenly across all tracks.
This will save you lots of processing power and you won’t need to duplicate all these effects across individual channels.
After you’ve applied your basic chain of EQ, compression, and reverb you can experiment and try some slapback delay or even chorus and see how it sounds.
How Do I Know How Much Is Too Much Compression?
In general, if the compression is ‘audible’ then you’ve already applied too much. Any kind of pumping sound or overly squashed result is a sign of too much compression. Of course in EDM that pumping sound might be stylistically relevant, but generally, it means that the threshold is too low or the ratio is too high.
Too much compression can also kill your dynamics, removing the impact of certain parts of your vocal performance. For some rock performances, a consistent wall of vocal signals might be desirable, but for emotional depth, there should be dynamics left in place.
What Is The Best Compression Setting For vocals?
A natural sounding vocal requires a ratio of around 2:1 or 3:1. This works great for sparse productions and for folk, but for rock and pop performances something higher like 5:1 or even as high as 8:1 will do the trick.
Be wary of having too fast an attack time. Around 60-100ms is the sweet spot. The release should be medium to long. If your compressor doesn’t have an ‘auto-release’ setting then just set the release to its highest point and dial it back until it feels right. Generally around 100-500ms is where you should be aiming.
Make sure to set your makeup gain so that it compensates for the attenuation caused by the threshold and ratio settings. If it’s being attenuated by 1-4dB you’ll want to boost the output signal via the makeup gain accordingly.


